NVME and SSD Firmware Secure Erase, Crypto Erase Guide
In addition to overwrites, rounds and passes NDW now support NVME, NVME M2 firmware erase as well as SSD, SATA ATA firmware erase. Secure erase is a feature of NDW that can be turned on or off.
Why HDD Firmware Secure Erase when NDW traditional erase is sufficient
This is a very good question. NVME / SSD are solid state devices they do not have spindles and drive heads, data is distributed across different parts of NVME / SSD storage chip and the firmware may keep some sectors as reserved for reallocation, sector redistribution and remapping may happen in the background without your knowledge. So some data may remain non-erased for those reserved sectors. In our experience data is not recoverable when the entire NVME / SSD is over-written but just for piece of mind and as extra precautionary measure storage device HDD manufacturer's firmware secure erase is introduced. Results of firmware secure erase are stored in the database and are included in the certificate of data erasure for each storage device.
Some security conscious companies may prefer to erase data by using traditional methods as well as secure erase and cryptographic key removal to make sure data is most certainly removed. In our honest opinion either secure erase or traditional method is sufficient to ensure the data is rendered non-recoverable.
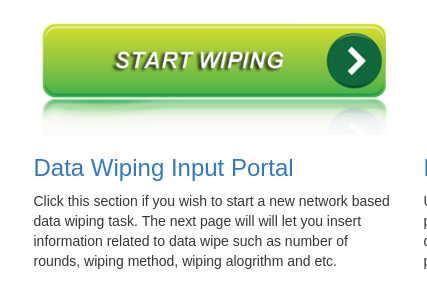
By default this feature is Enabled. In order to enable or disable this feature, browse to http://192.168.1.253 and click "Start Wiping" button.
Please note: Firmware secure erase is hard disk drive firmware feature, some hard disk drives do not support this feature. For those supporting this feature NDW is able to detect the secure erase capability and instruct the firmware of HDD to erase / sanitise data. To check whether this feature is supported for your storage device please refer to hard disk manufacturer's specifications.
In the next page, fill all the details and enable or disable Secure Erase feature. See below screenshot.
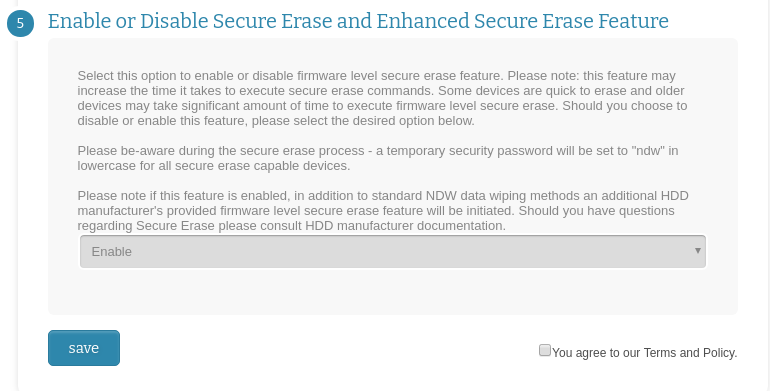
Make desired setting changes, save and exit.
Now boot your NVME, SSD or SATA equipped workstation / laptop / notebook / server machine into network PXE.
You may see following screen during the boot process.

Next you will see Smart Information related to each HDD, at this point you can hotswap the HDDs if you wish, otherwise continue to the next stage. Next screen will show a warning message.
Next you will see NDW application begining to wipe data automatically from all attached hard disk drives.

You can see above a screen shot taken from a system that is currently wiping 8 x HDD over network. Information and realtime progress of each HDD wipe is shown in a widget above.
You will also see following screen, see below. On the wiping workstation screen displays will automatically switch between above and below screen. Below screen will display comprehensive and detailed information for each hard disk drive, above above widgets will only display brief information.

Once NDW application in graphical user interface has finished wiping data, NVME / SSD or SATA secure erase firmware level and crypto erase will initiate if supported by the storage devices. See below screen an example of NVME M.2 SSD firmware data erasing. NVME firmware erase does not take long time to execute because it just erases the cryptographic key to render data non-recoverable. Whereas traditional SATA firmware erase may take long time to execute.

See below another example of laptop SATA HDD firmware erase. This drive is reporting 58 minutes to execute firmware secure erase.

Label for each erased storage device will automatically print. See below example.

Important note: Above is just an example of one machine wiping data over network, you may start wiping hundreds or thousands of machines at the same time. (All machines wiping data from attached hard disk drives concurrently) Now just imagine, if you are wiping data from 100s or maybe 1000s of machines concurrently, each machine may have multiple hard disk drives, see the above expample; in this case it would be extremely difficult to monitor all machines and HDD at once. To address the managability, we have now created a realtime and live monitoring portal, where you can monitor all machines and hdds progress in realtime from a click of mouse using management portal.

To view simple dashboard just visit the home page http://192.168.1.253 and you will see following on the top section of the page. This information is realtime and live. It updates automatically without refreshing the page.

To view live and realtime progress of each system that is currently wiping or has failed to wipe or has finished wiping sucessfully, visit following link from the front page or click any box displayed above in the dashboard.
The next page will display those systems currently wiping, or have finished wiping within last 12 hours, or failed to wipe within last 12 hours. Data showing in this section is realtime and live. (failed, finished wiping or stuck systems are shown only for last 12 hours in this section). You can see below there are 3 systems currently wiping data and status is in progress, 2 x systems have finished successfully wiping data.

Important Note: If you wish to drill down further into each system, you can click the widget to see progress related to each Hard Disk Drive.
See below, click ICP / iEi - SYS ID: 00089bca8f01 widget, following information related to each Hard Disk Drive is displayed. You can see this system has 8 Hard Disk Drives, and only 7 are currently wiping and 1 HDD has failed to wipe.

Important Note If you wish to drill down further into each Hard Disk Drive, you can do so by clicking the HDD widget, this will open up another page which will show detailed information related to that specific Hard Disk Drive. See below an example.

Conclusion: In this section, you have learnt how to use NDW to erase NVME and SSD, SATA, ATA (firmware erase and crypto erase feature). To learn more, please refer to the NDW User guide.
